Getting started with Utopia Figma Plugins
By James & Trys
Until now, the tooling for Utopia has been predominantly developer-focused, but we know that's only half the story. To start to address this, we've created a pair of Figma plugins to help designers set out Utopian project foundations.
To begin with, install the Utopia type + space calculator plugin from Figma Community, and create a new Figma design file. Then run the plugin from the menu:
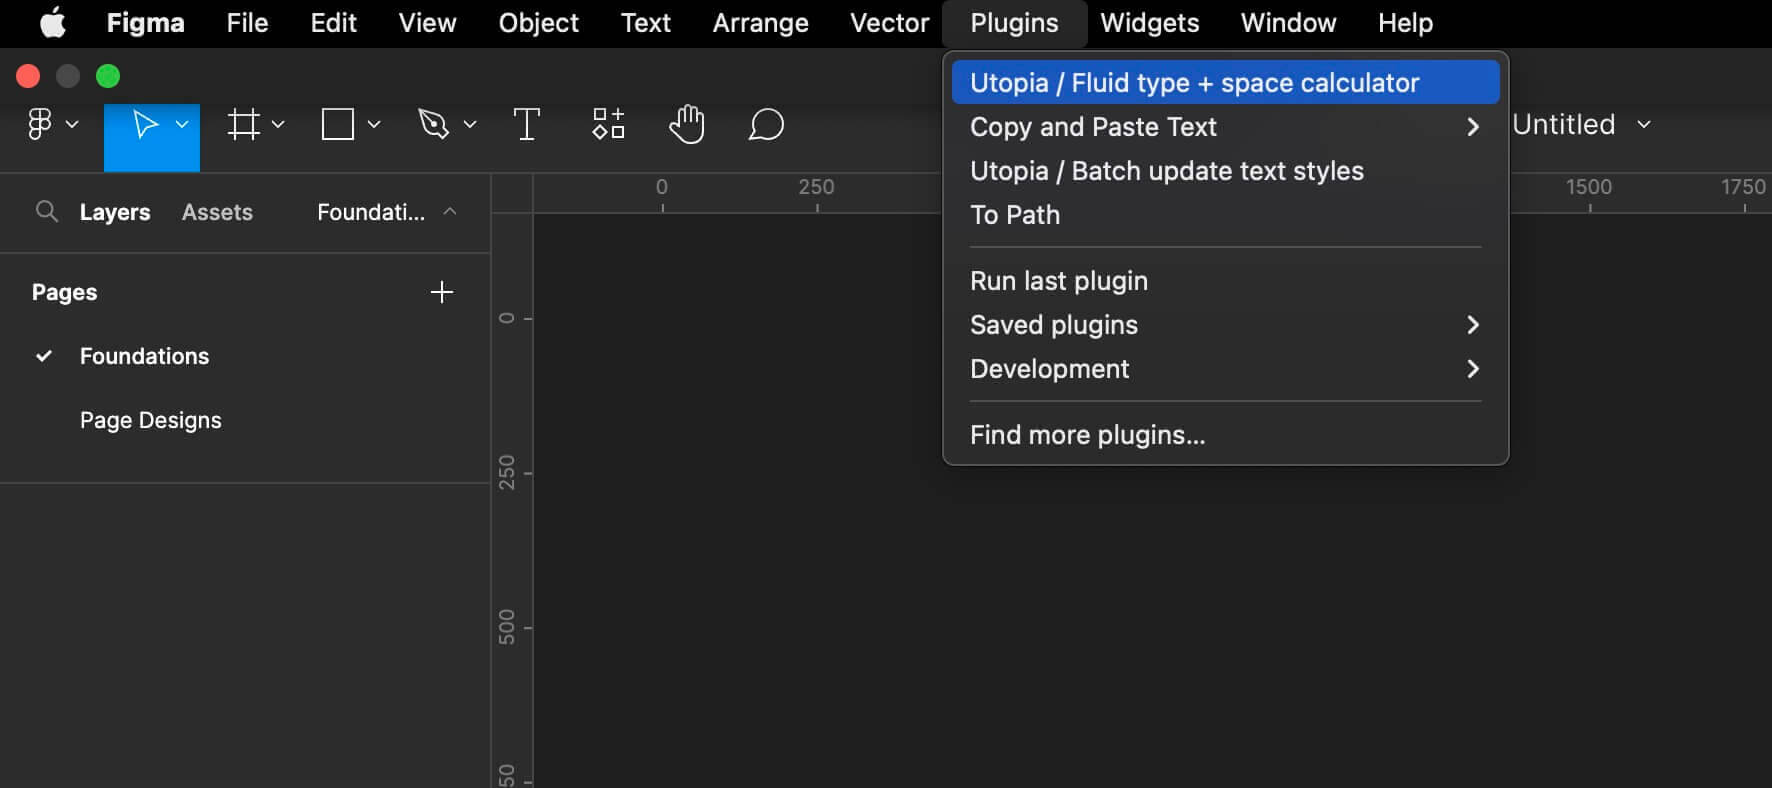
Setting up your type and space scales
An info window will appear with some input fields that'll feel familiar if you've ever used the calculators on utopia.fyi. In fact, the first field allows you to paste a URL directly from one of the calculators, which will read any settings you've previously configured:
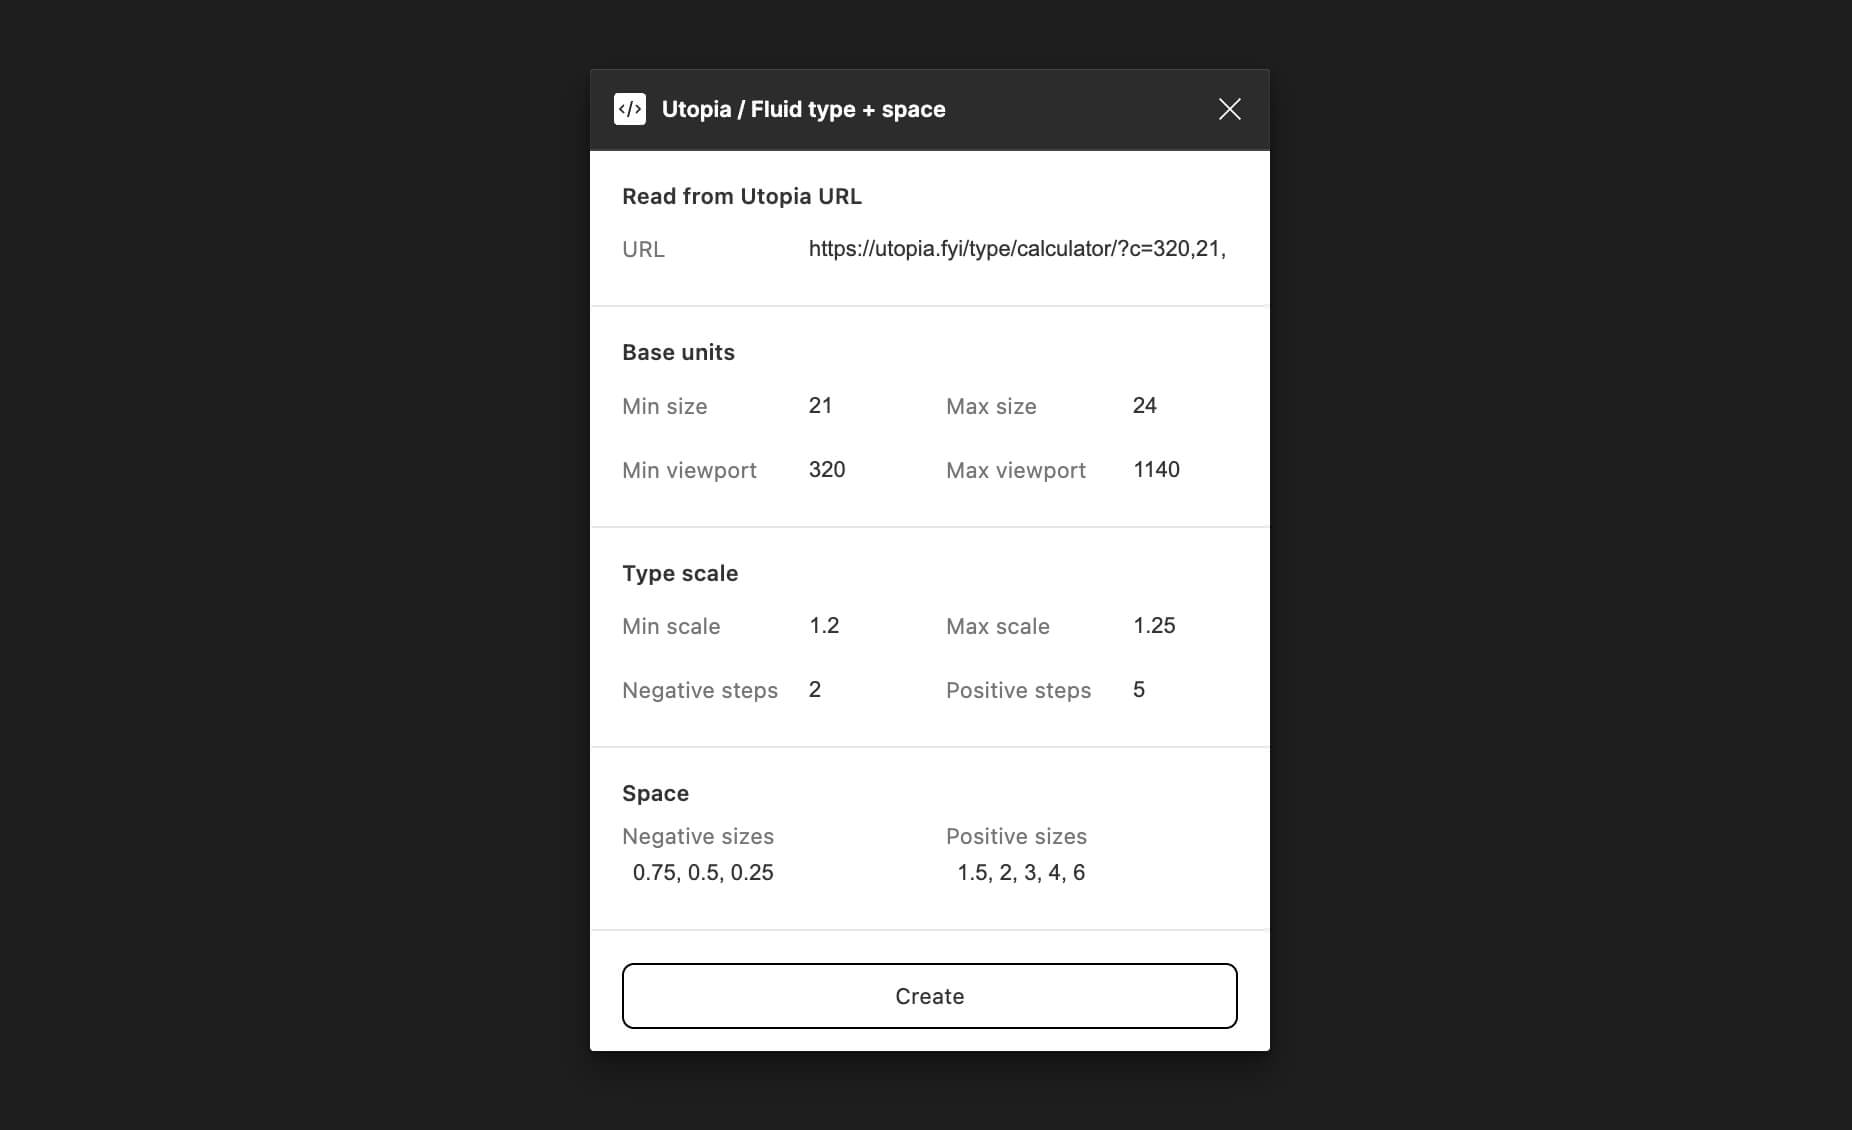
Once you're happy with the values, click 'Create'. The plugin will generate five artboards in the document:
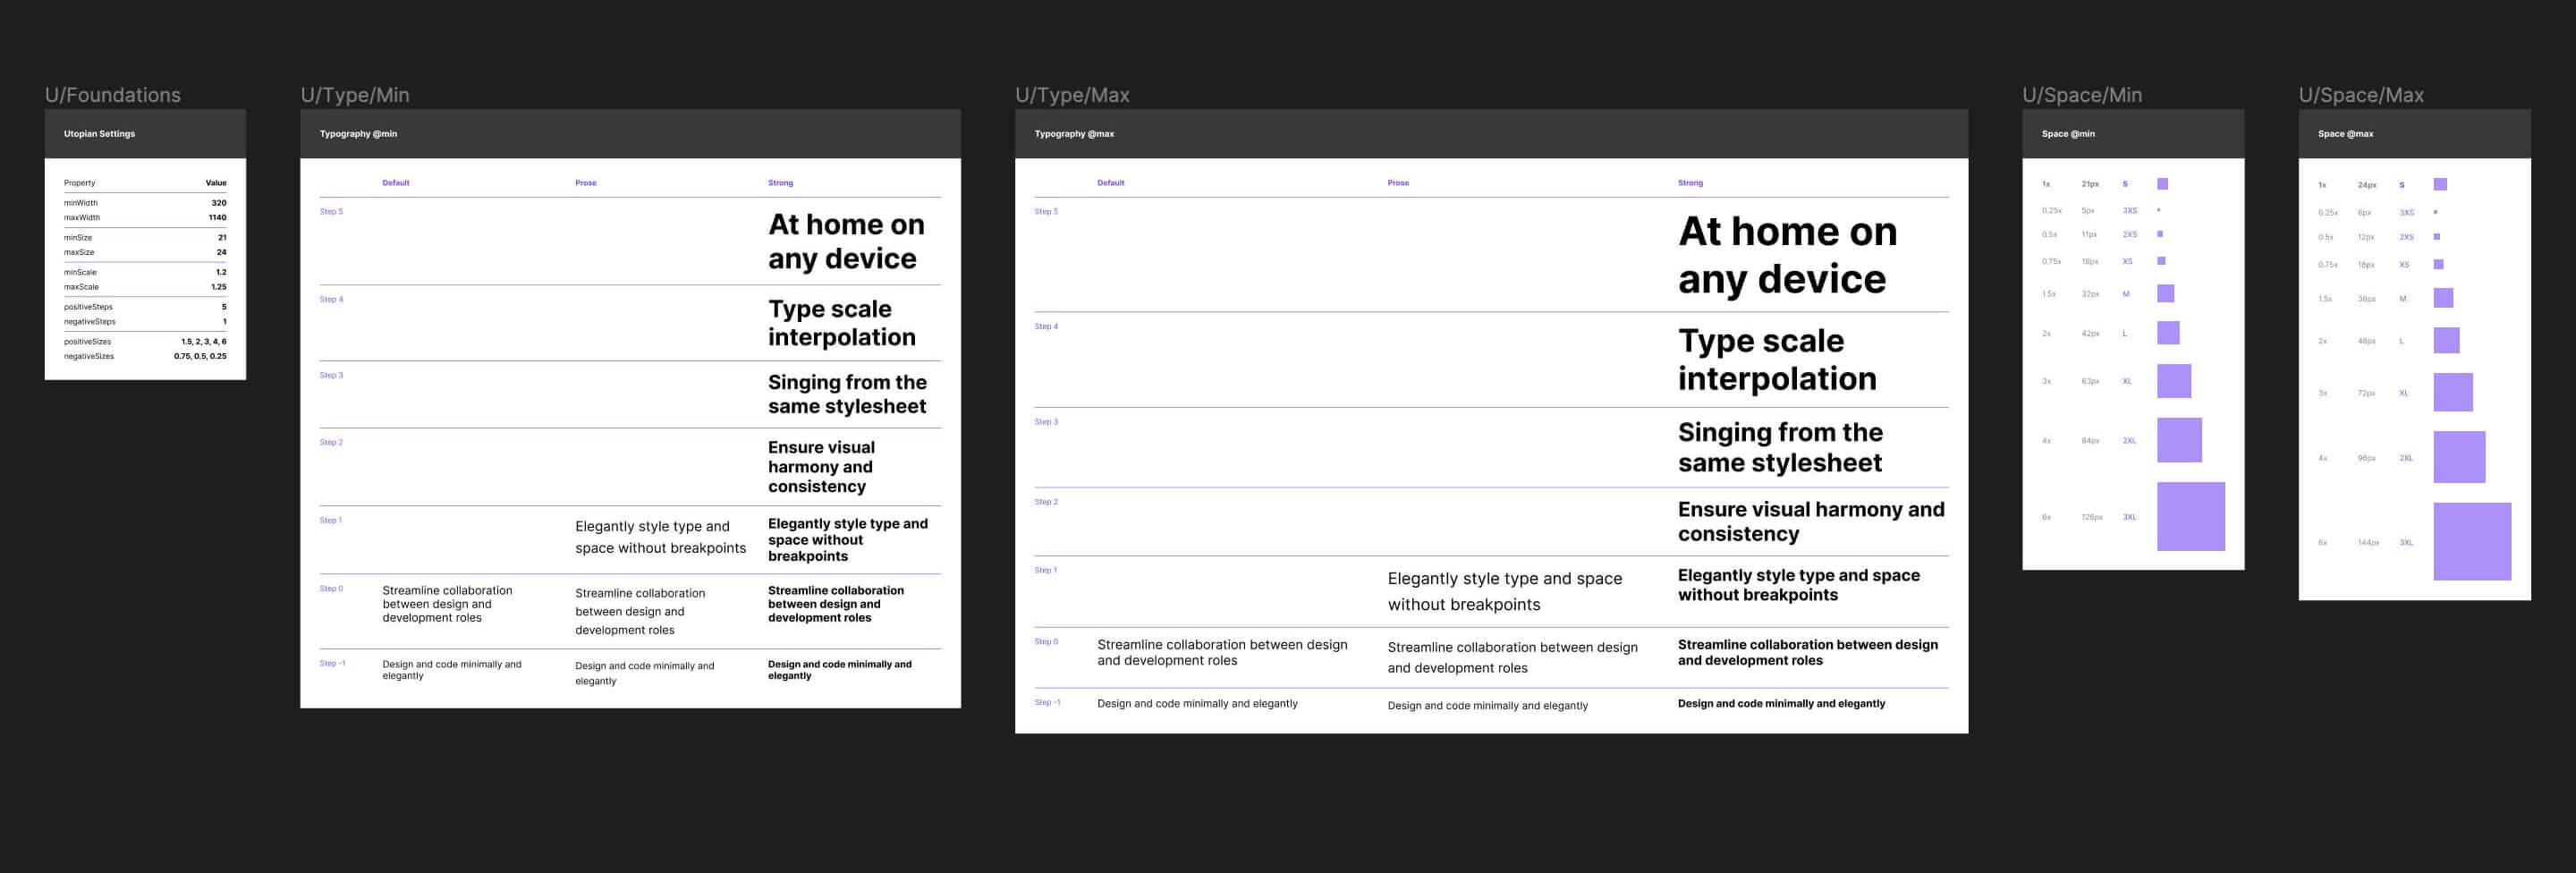
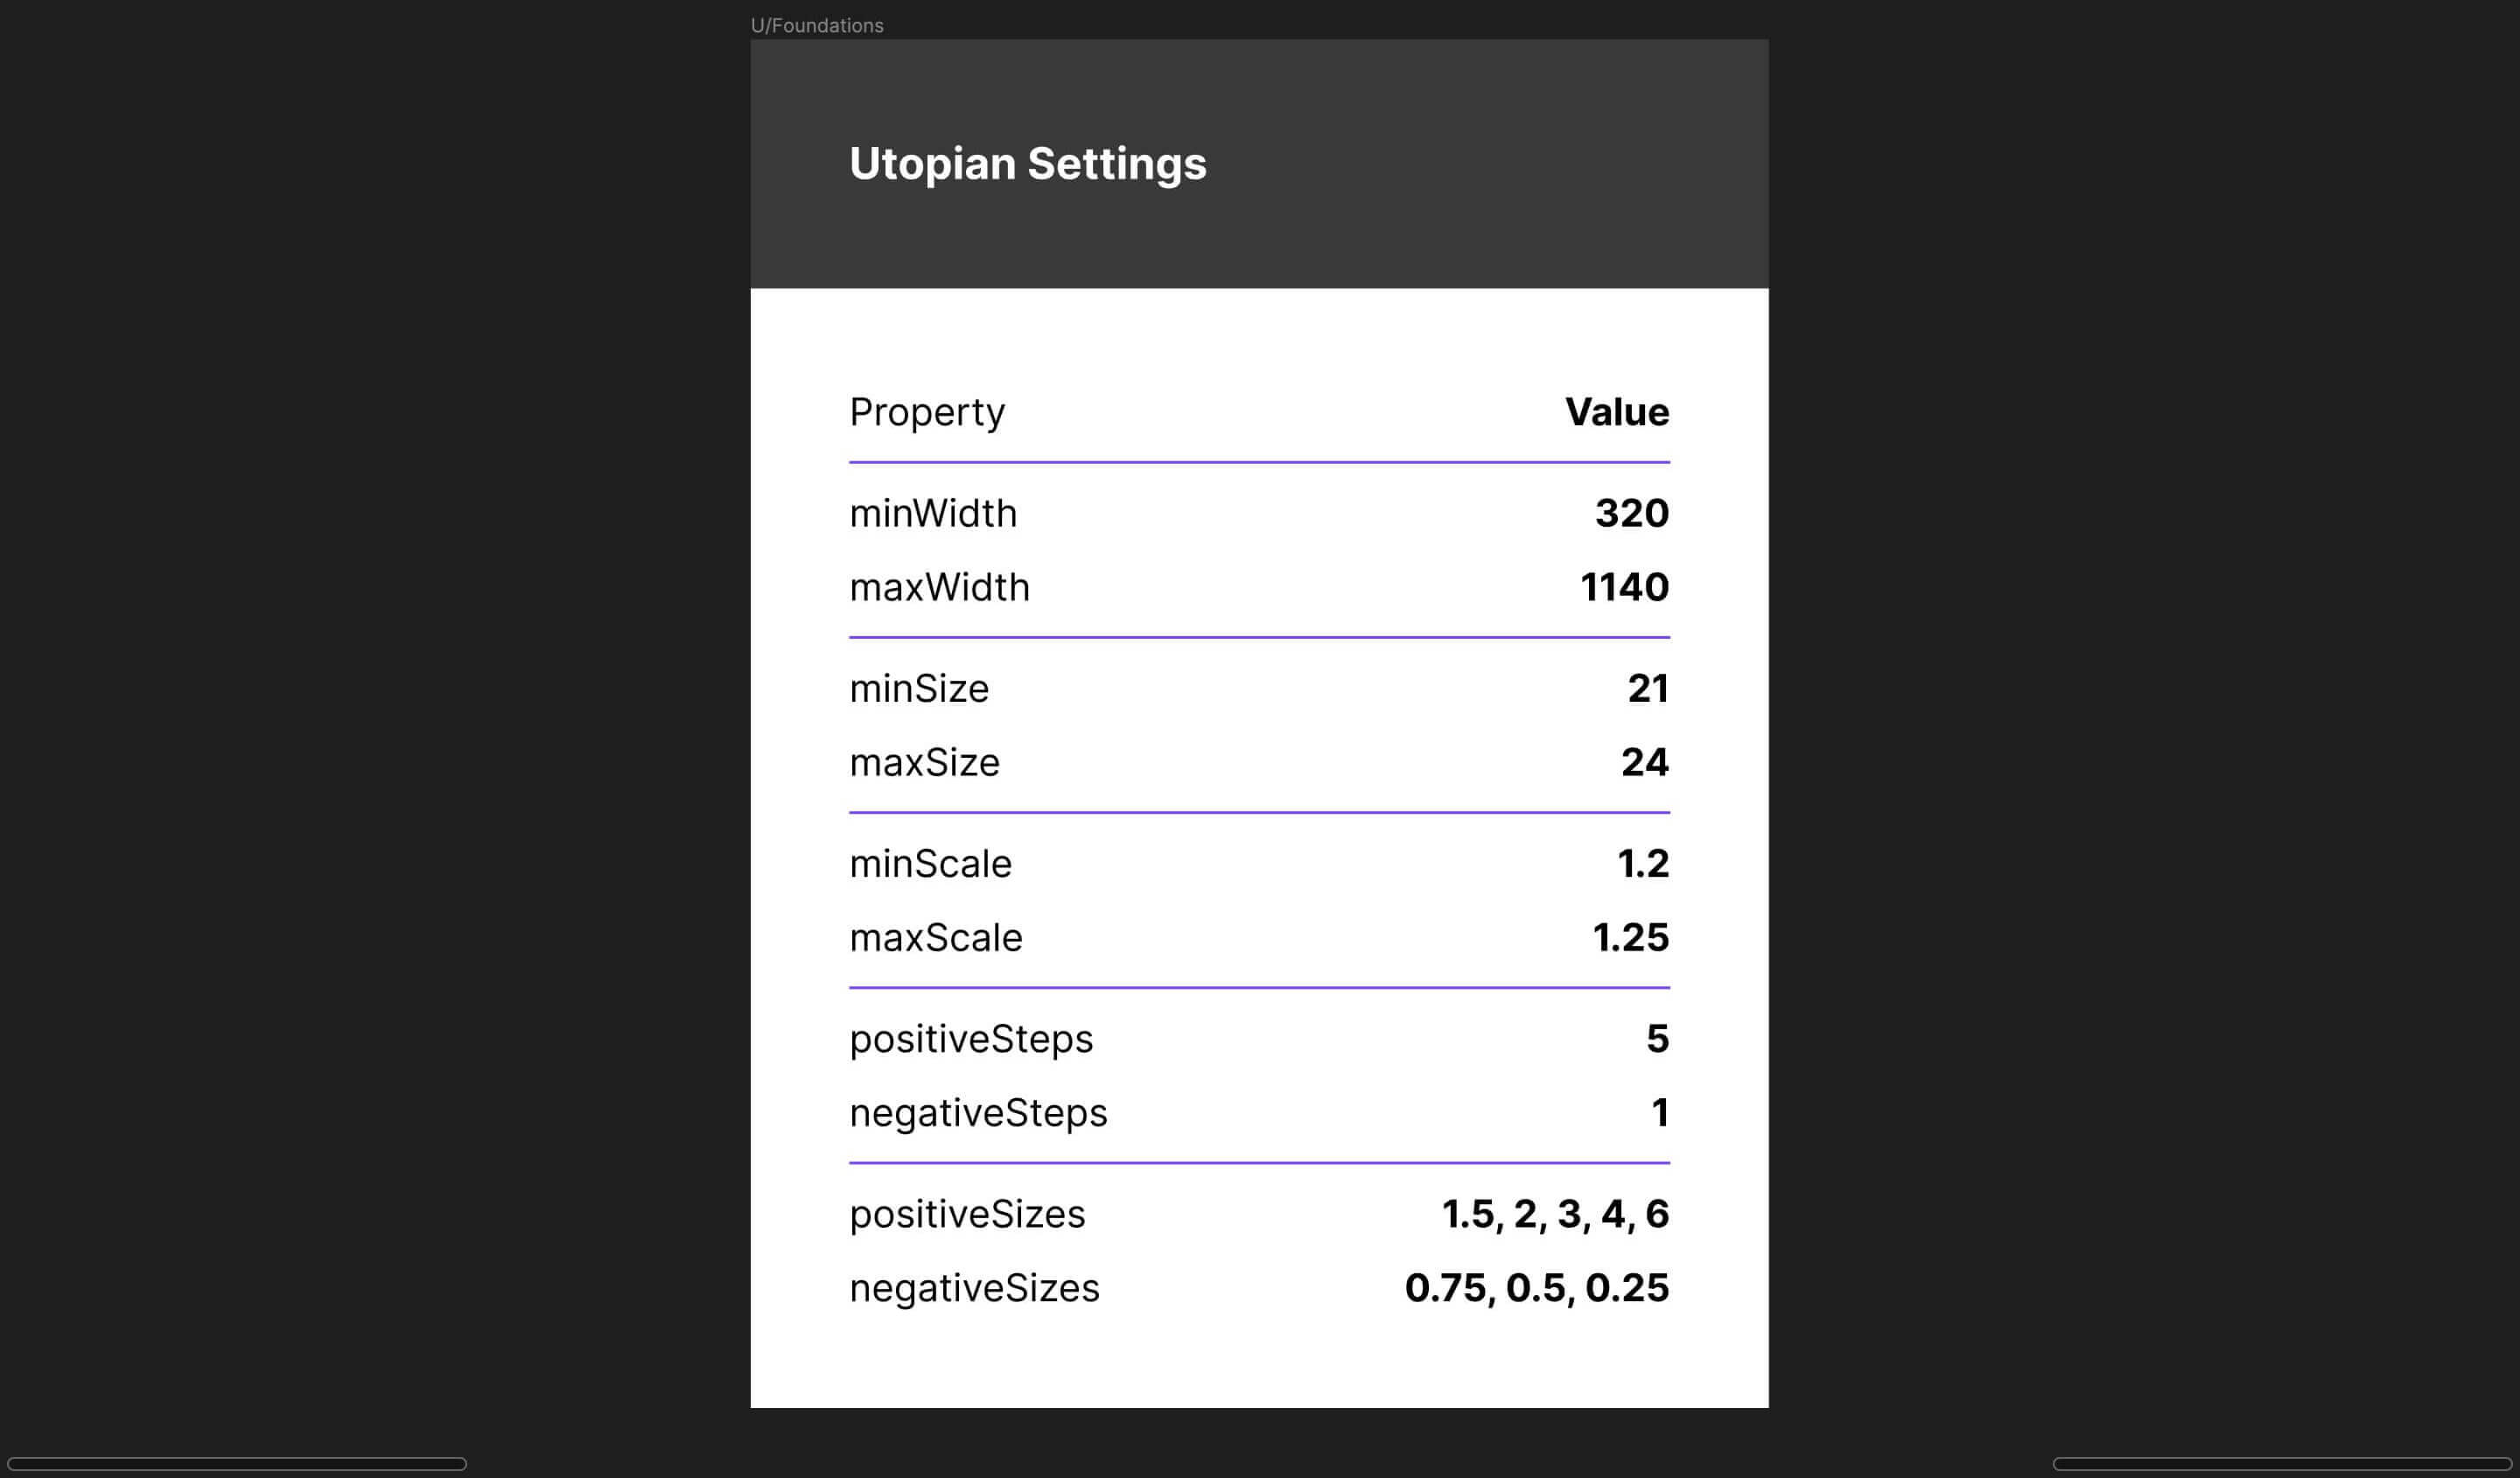
Settings artboard
From left to right, the first is a settings artboard that acts as a source of truth for the Utopian values in the document. If you re-run the plugin at any point, it will read these values in as a starting point.
Space artboard
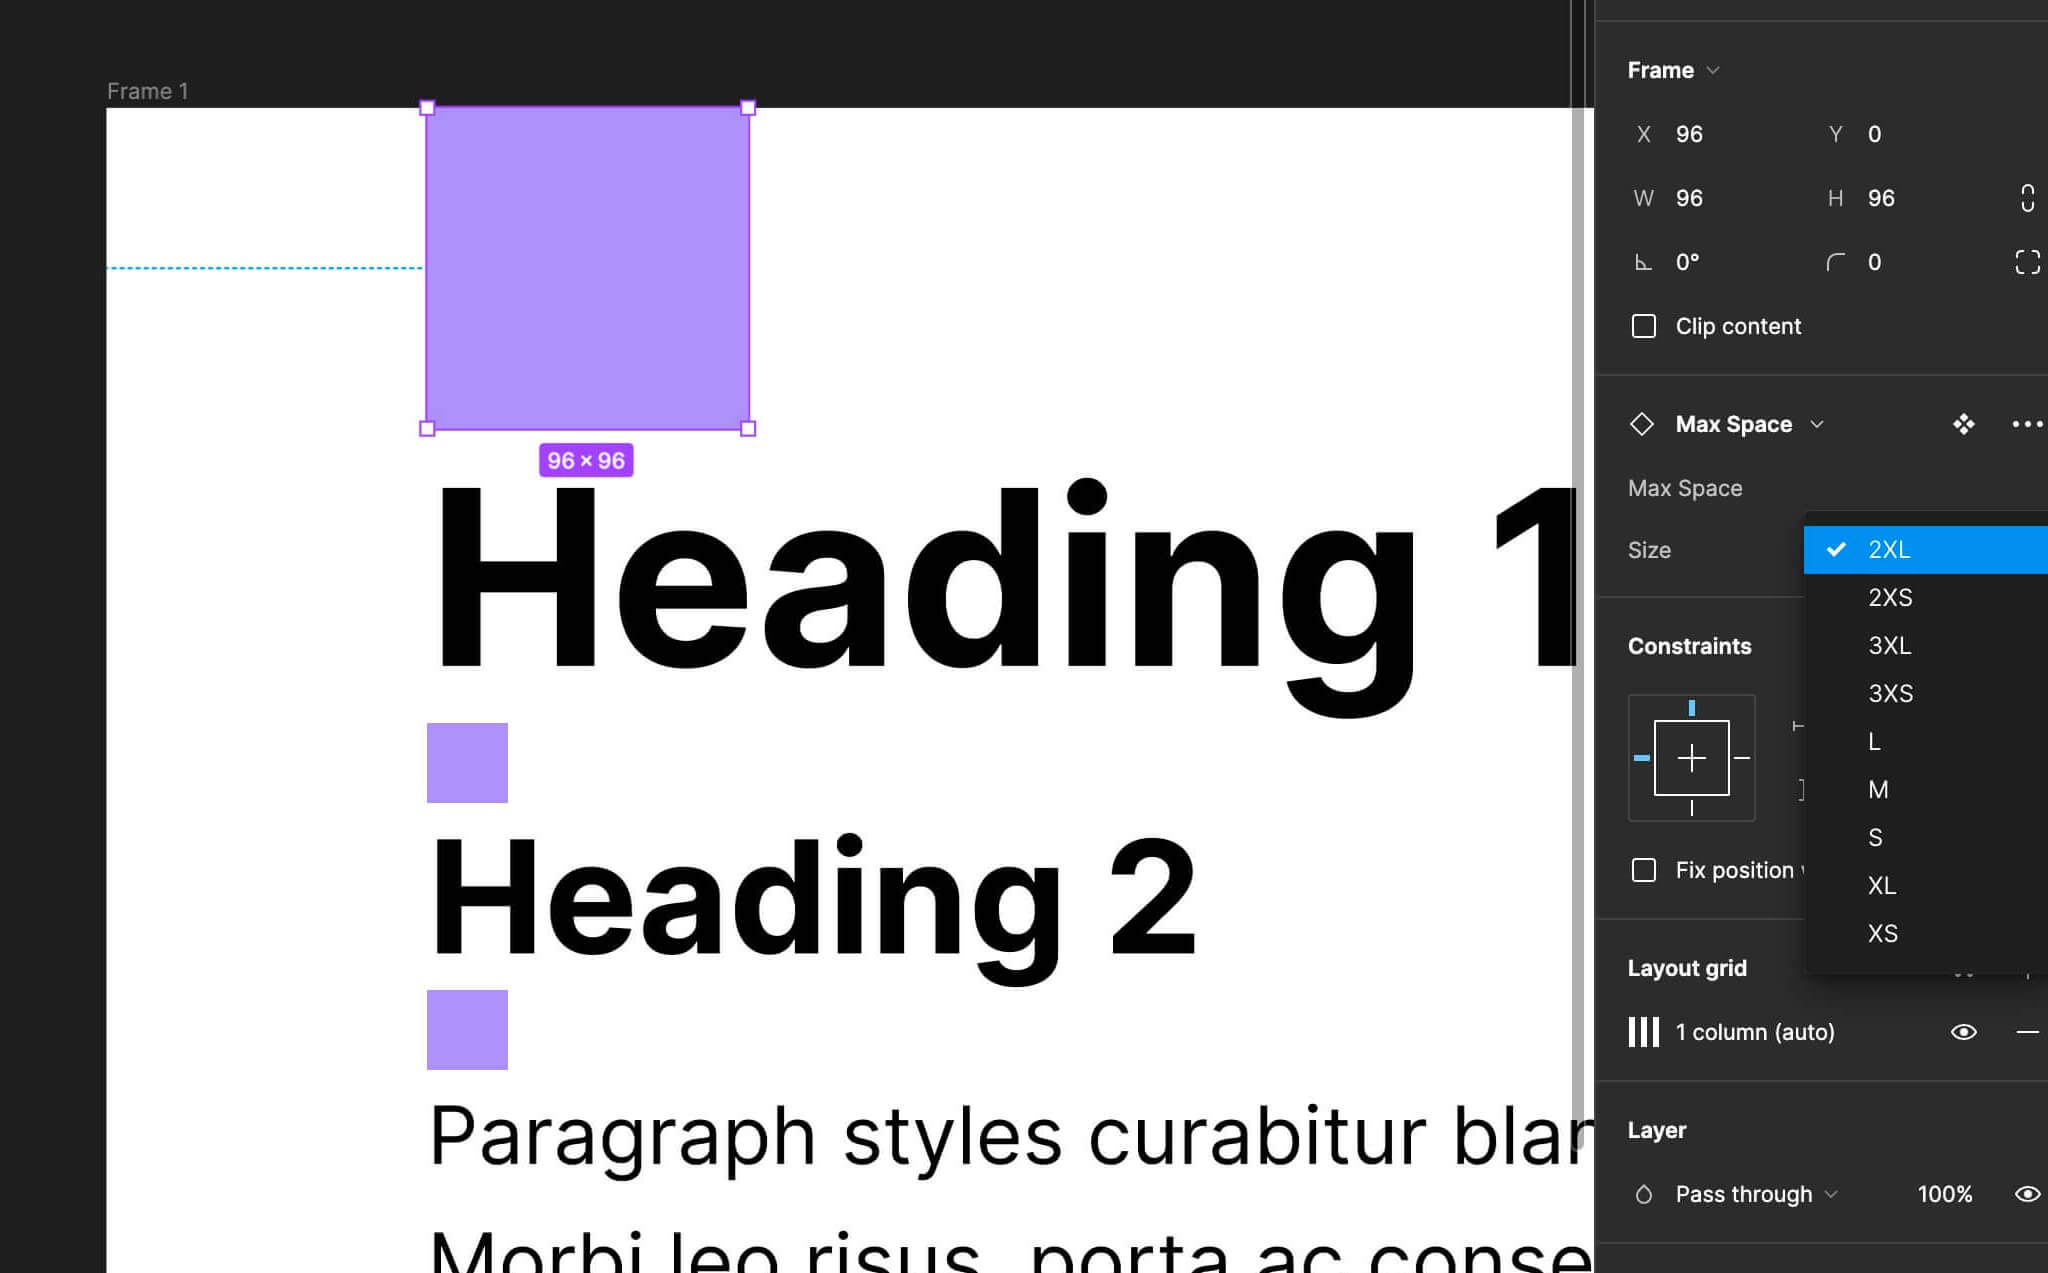
The next two artboards are your space scales, which are set out for your minimum & maximum viewports. Rather than use a background colour, these space units use the Layout Grids feature in Figma so will only show when the grids are active. Press [Shift+G] to toggle grid visibility within Figma:
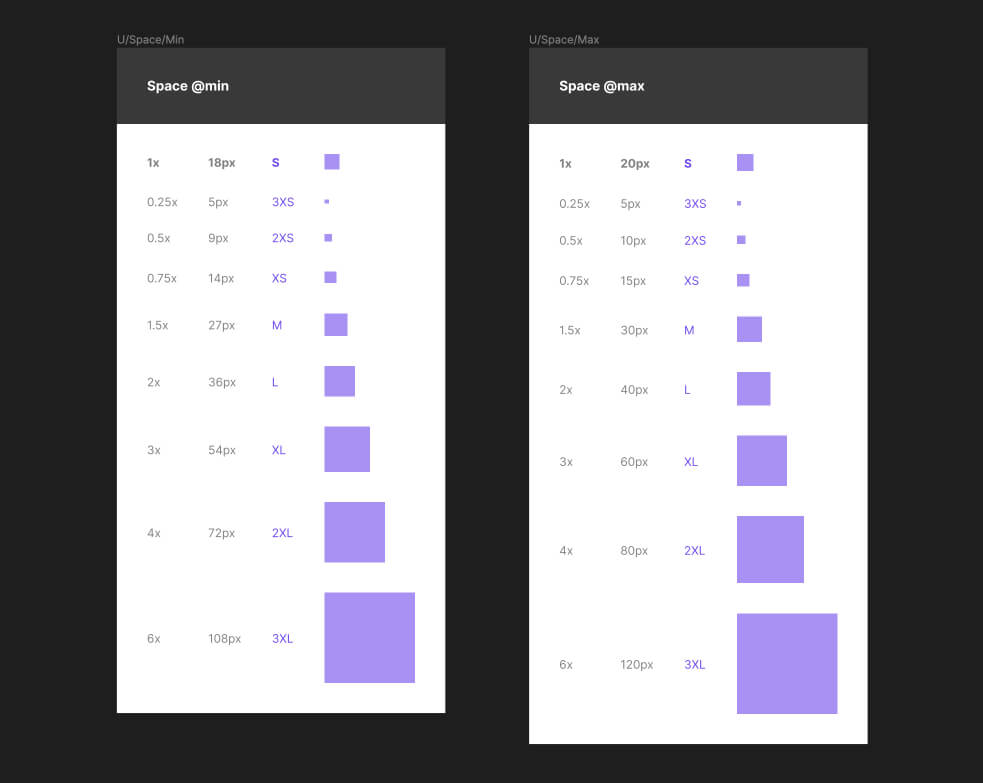
These components can be placed within a design to document space between elements, or used as a temporary reference guide when designing a component. The 'Size' parameter in the right side panel in Figma allows you to choose which space step to use within your design:
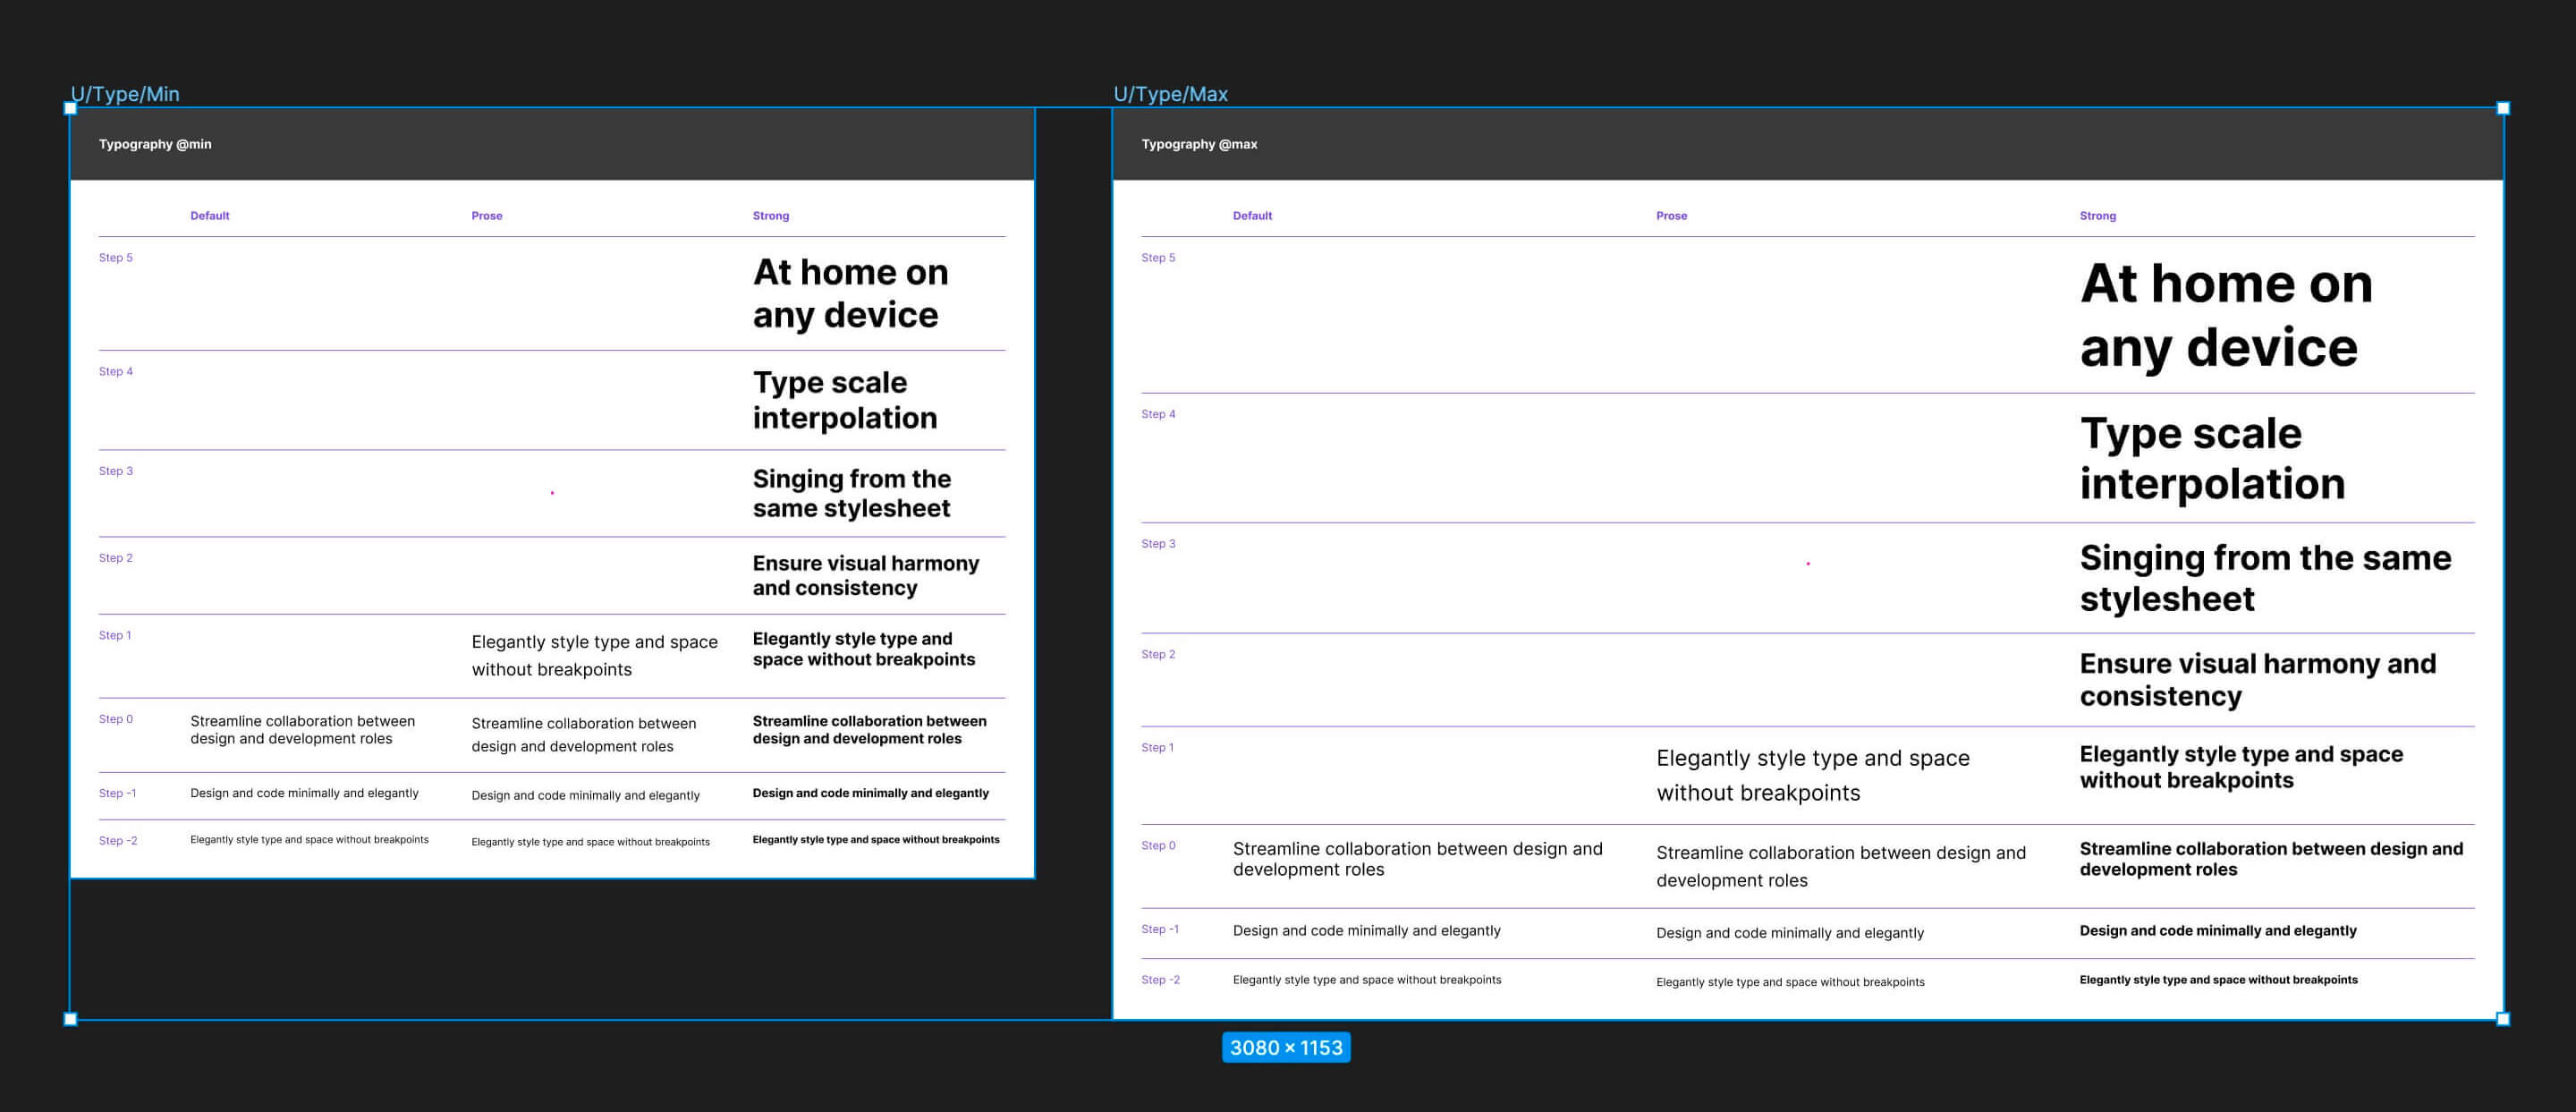
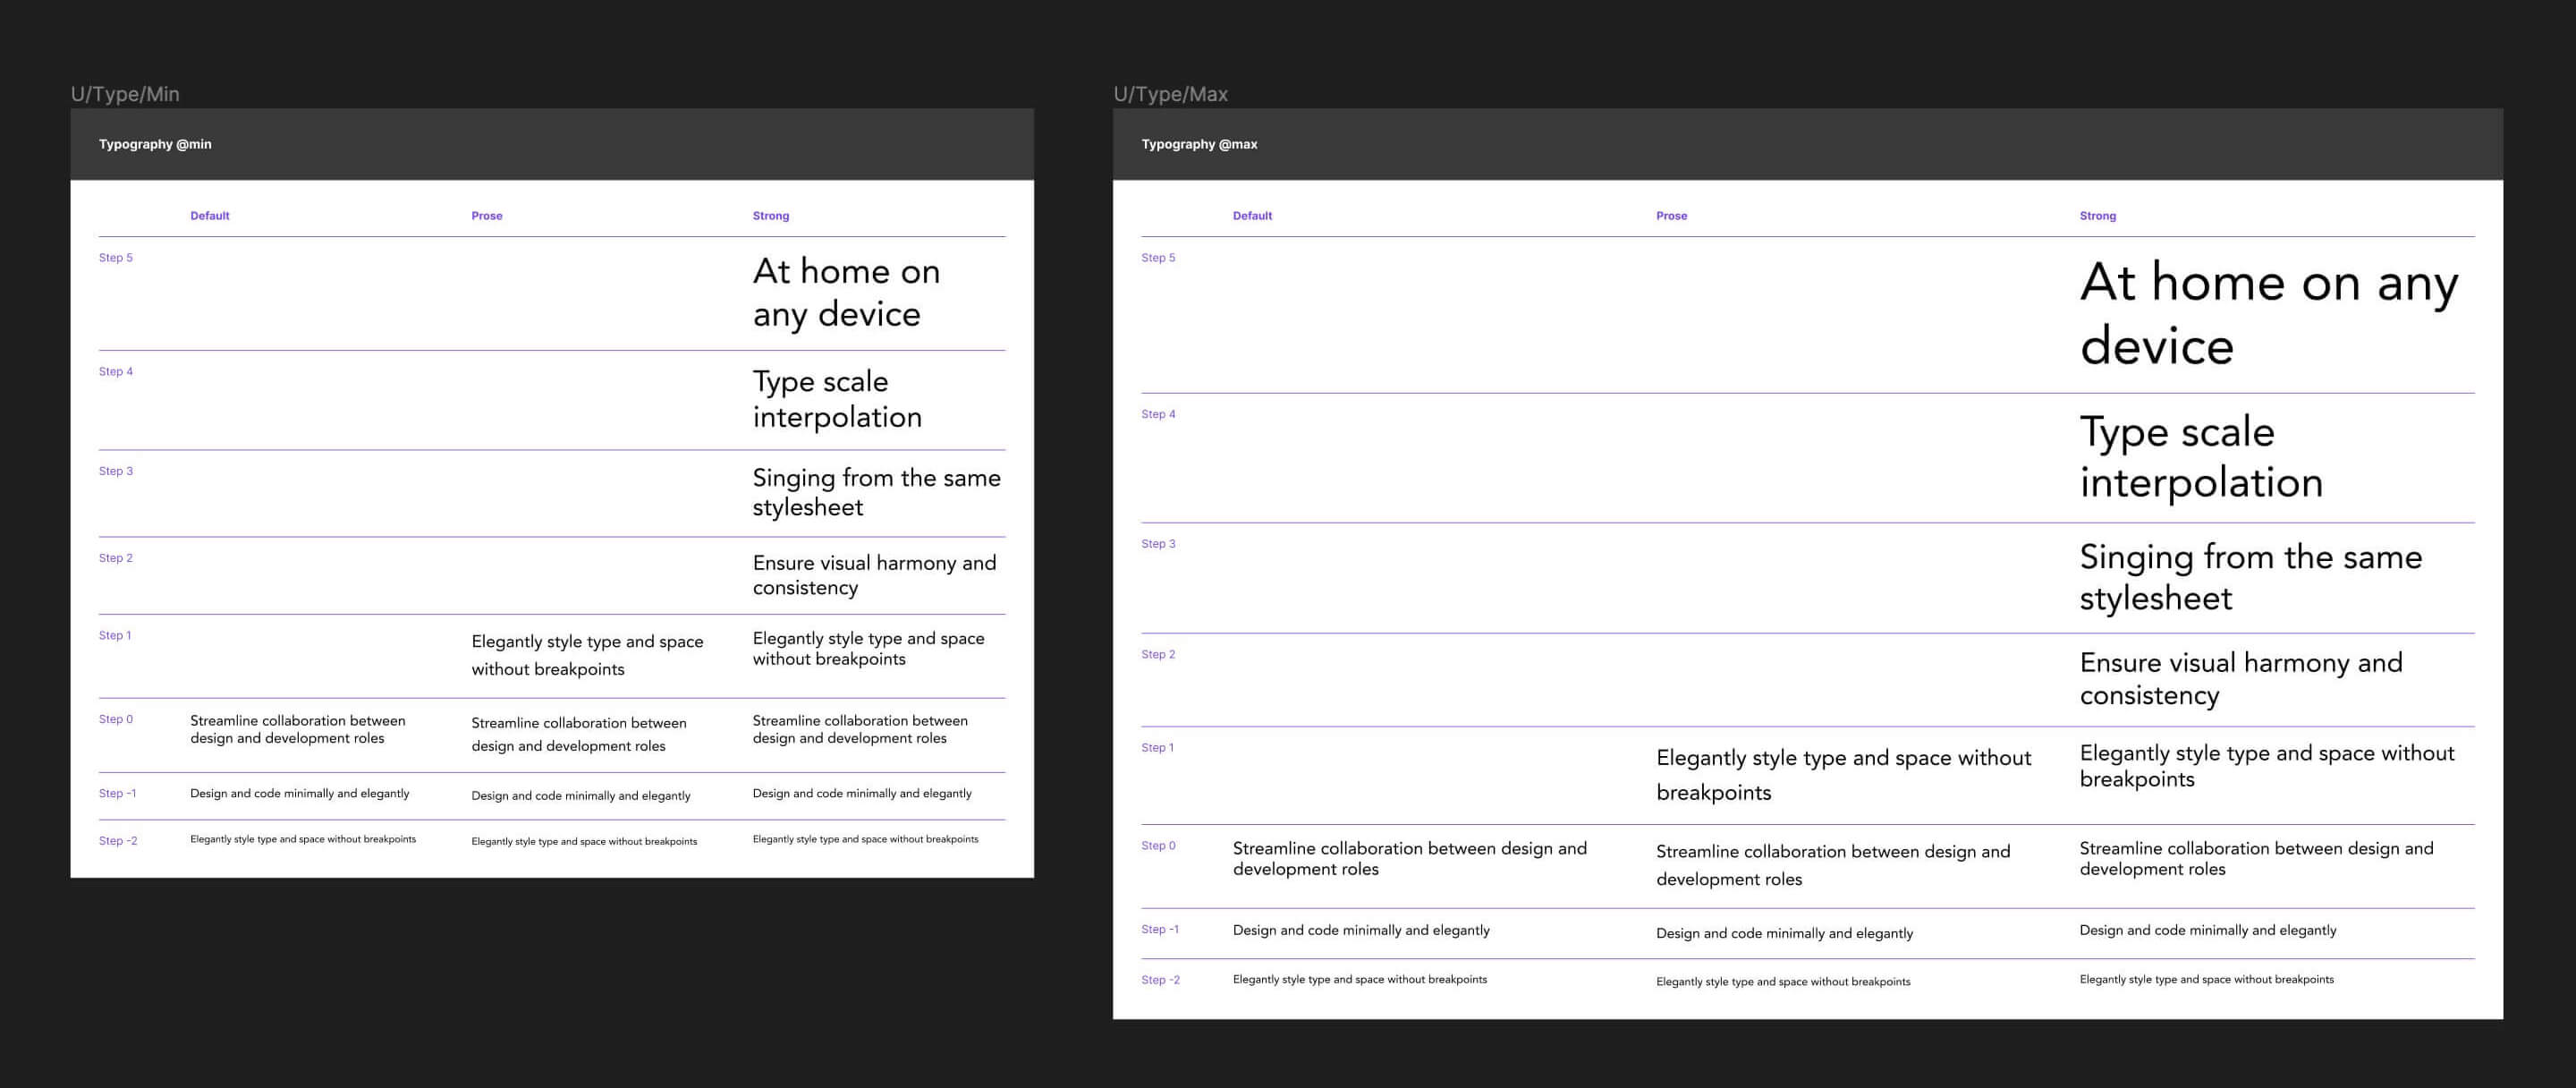
Typography artboard
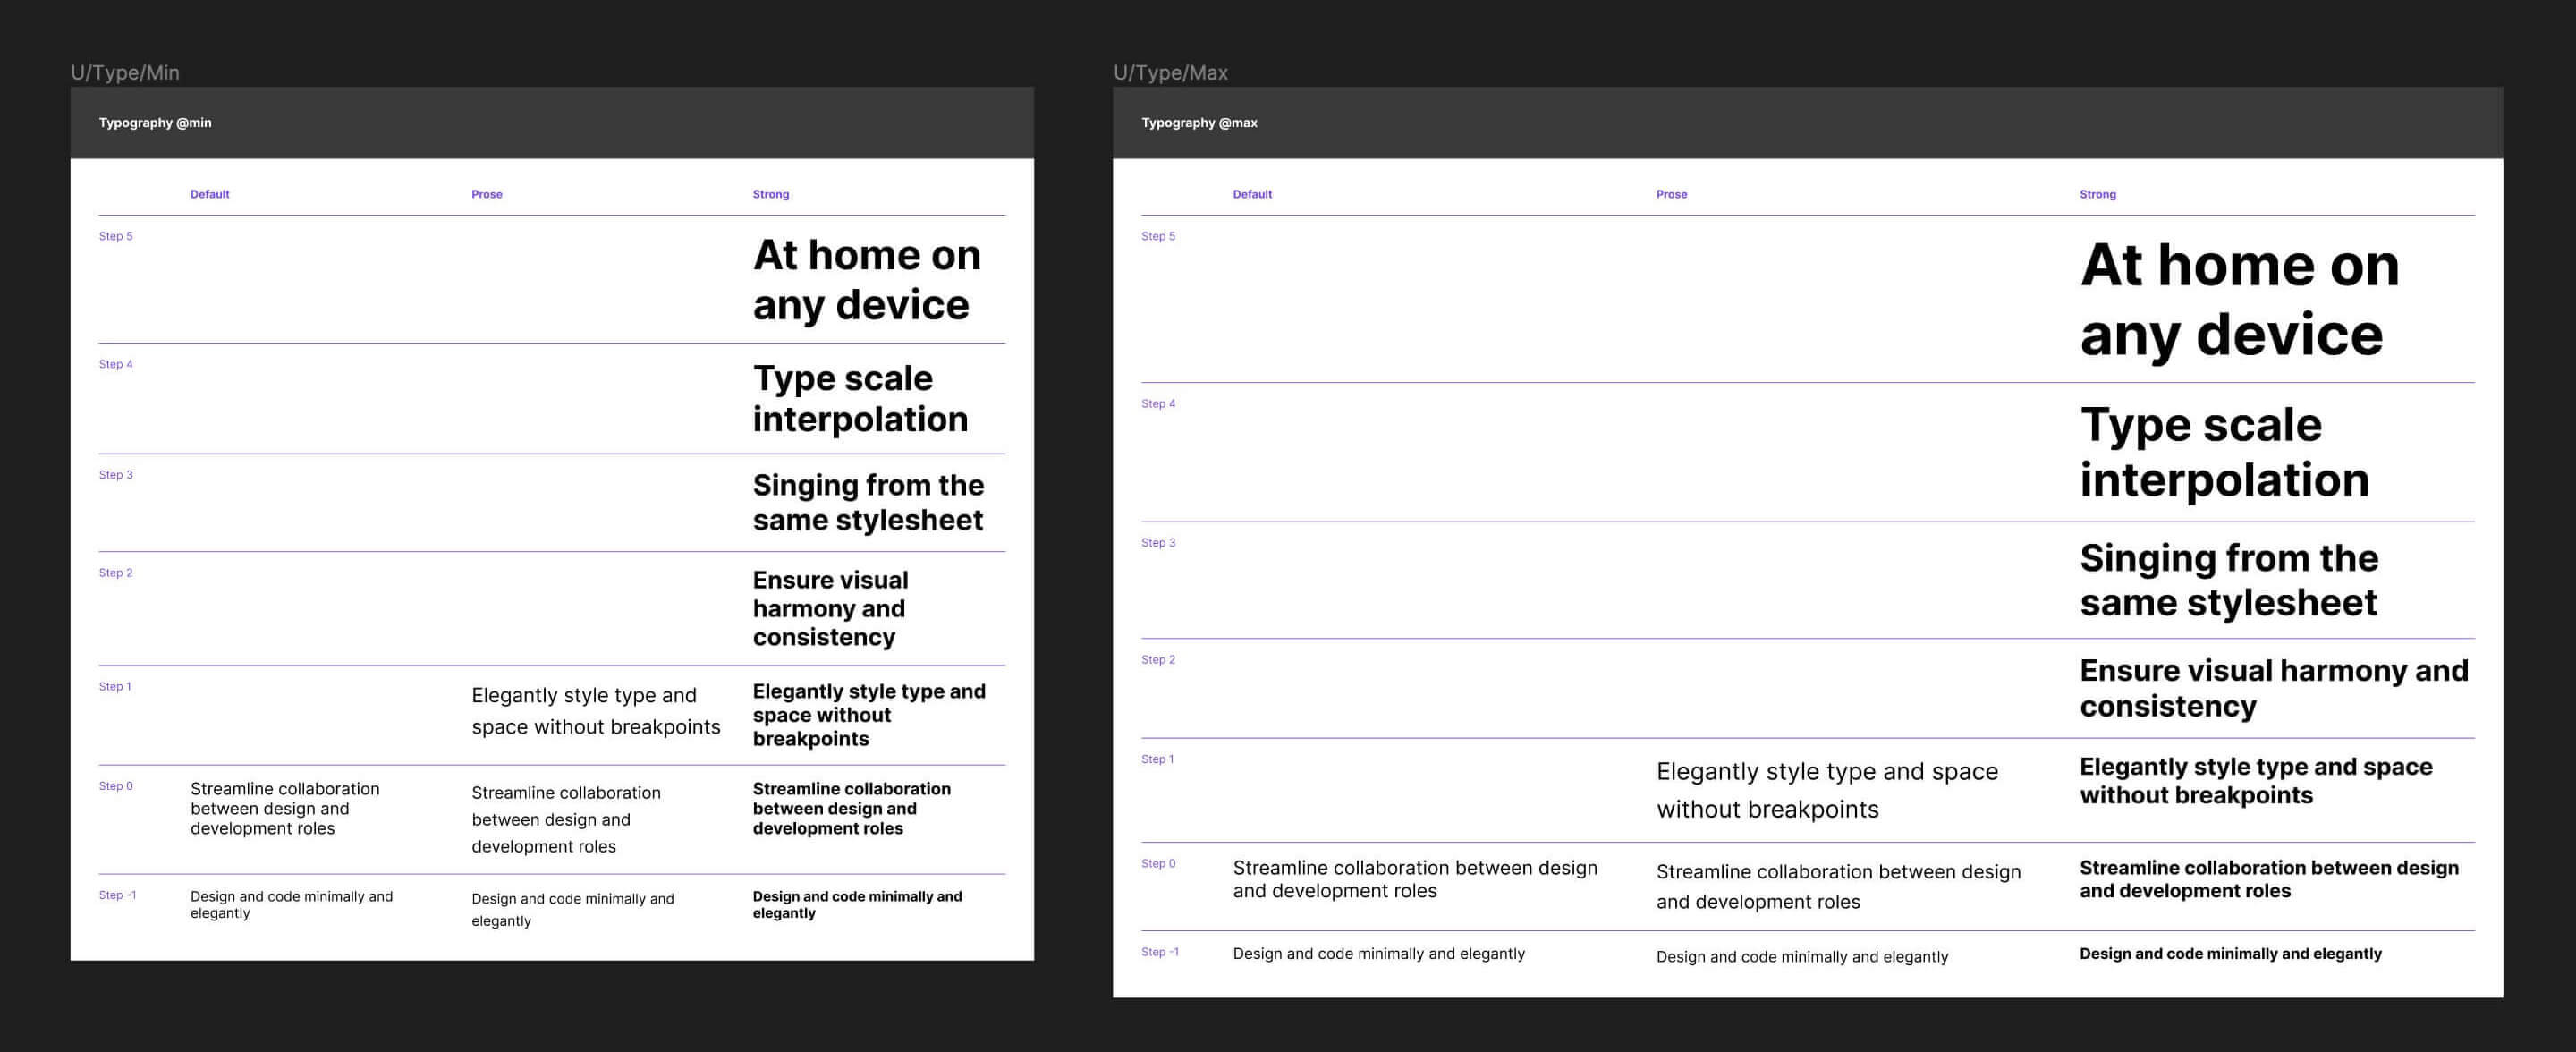
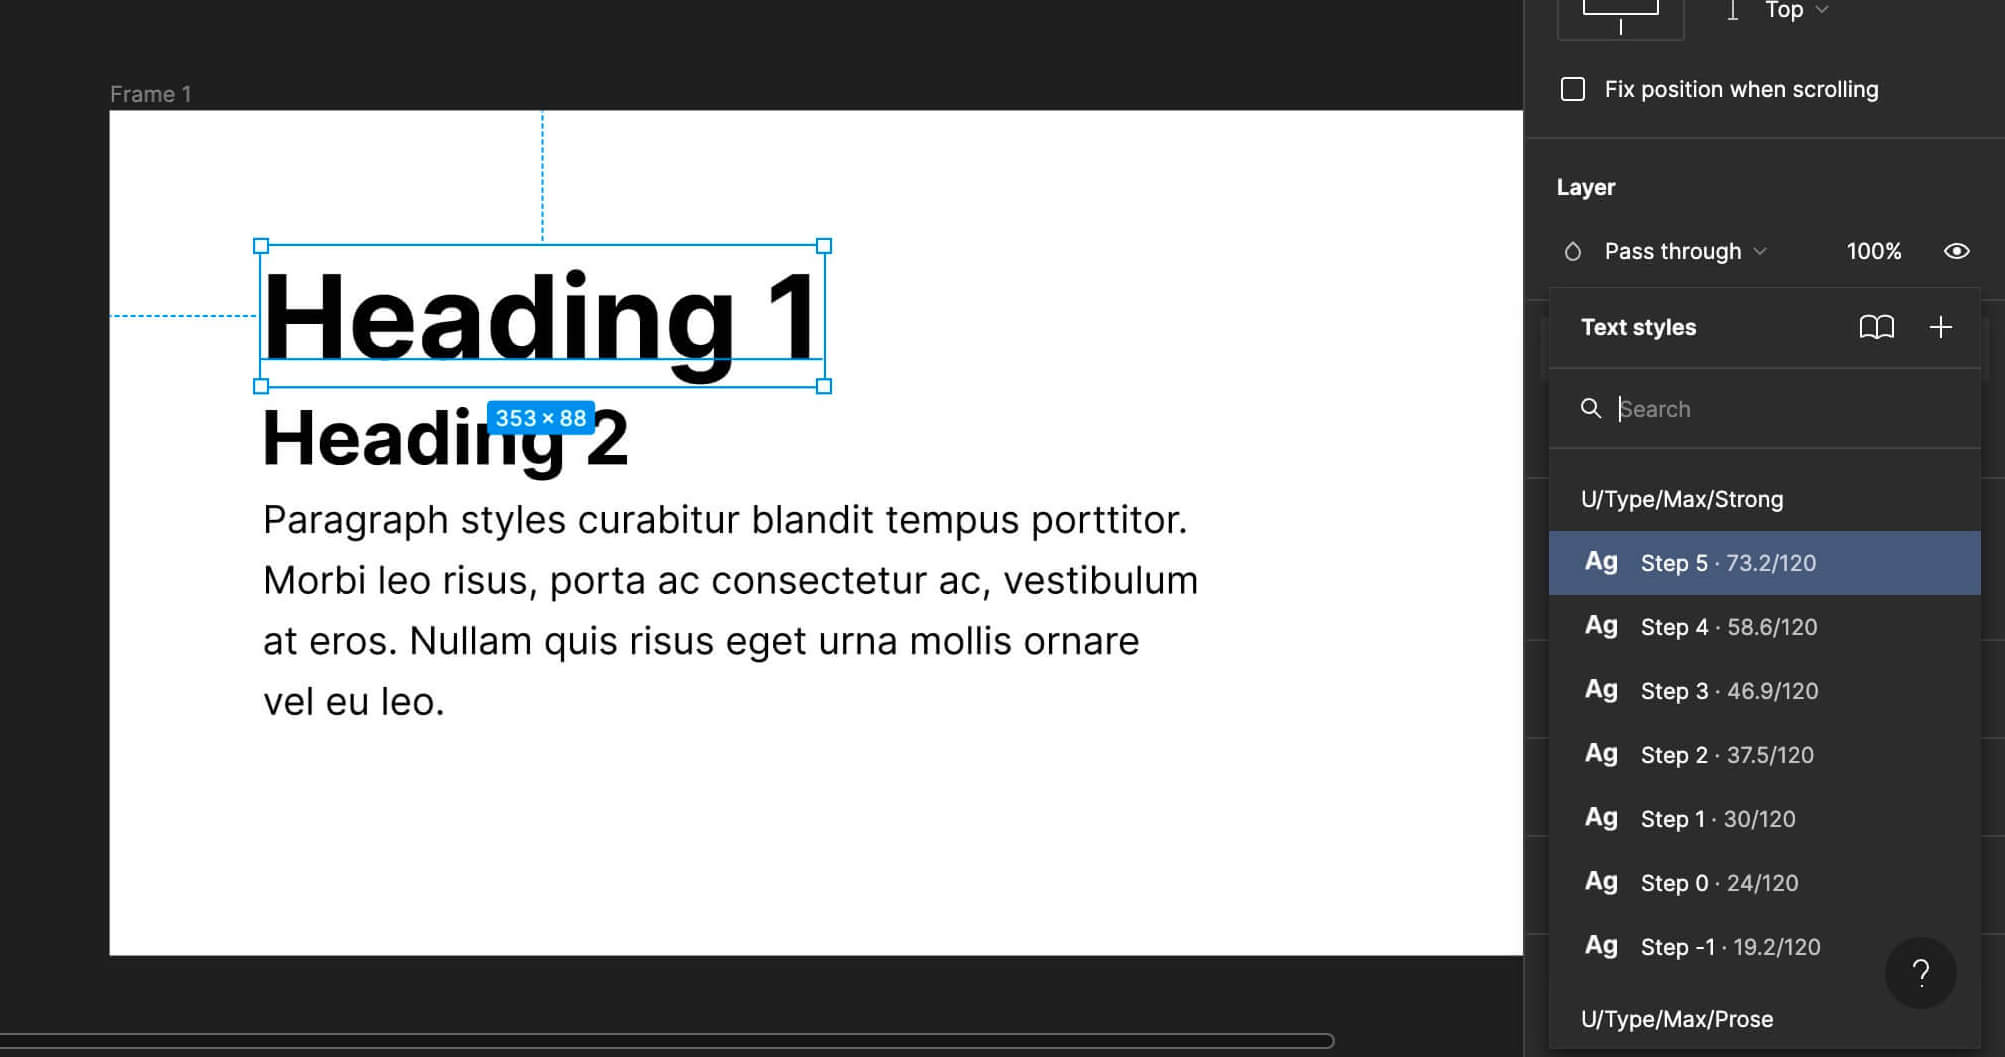
The last pair of artboards are your typographic scales, also presented according to your min and max viewports. You can configure the number of negative and positive steps within the plugin. There are three sets of type styles generated for both viewports. We typically use a Strong style for headings and other text that we want to visually punctuate our designs. The Prose style is useful for longer-form text which might benefit from a larger, more relaxed line height. The Default style is a catch-all for other snippets of text in our designs, like a standlone link, a short piece of explainer text, or perhaps an image caption. The number and variety of styles required will vary depending on your design's purpose and style but these three serve as a reasonable starting point.
These type styles can be accessed from the right side panel in Figma:
Updating typographic styles
Now you've generated a set of typographic styles, you'll probably want to change the typeface. Utopia uses Inter as the default font. Inter is an excellent chameleon-like typeface, but it might not be suitable for your design. As of November 2022, updating multiple text styles at once isn't natively supported in Figma, so we've created a utility plugin to do just that.
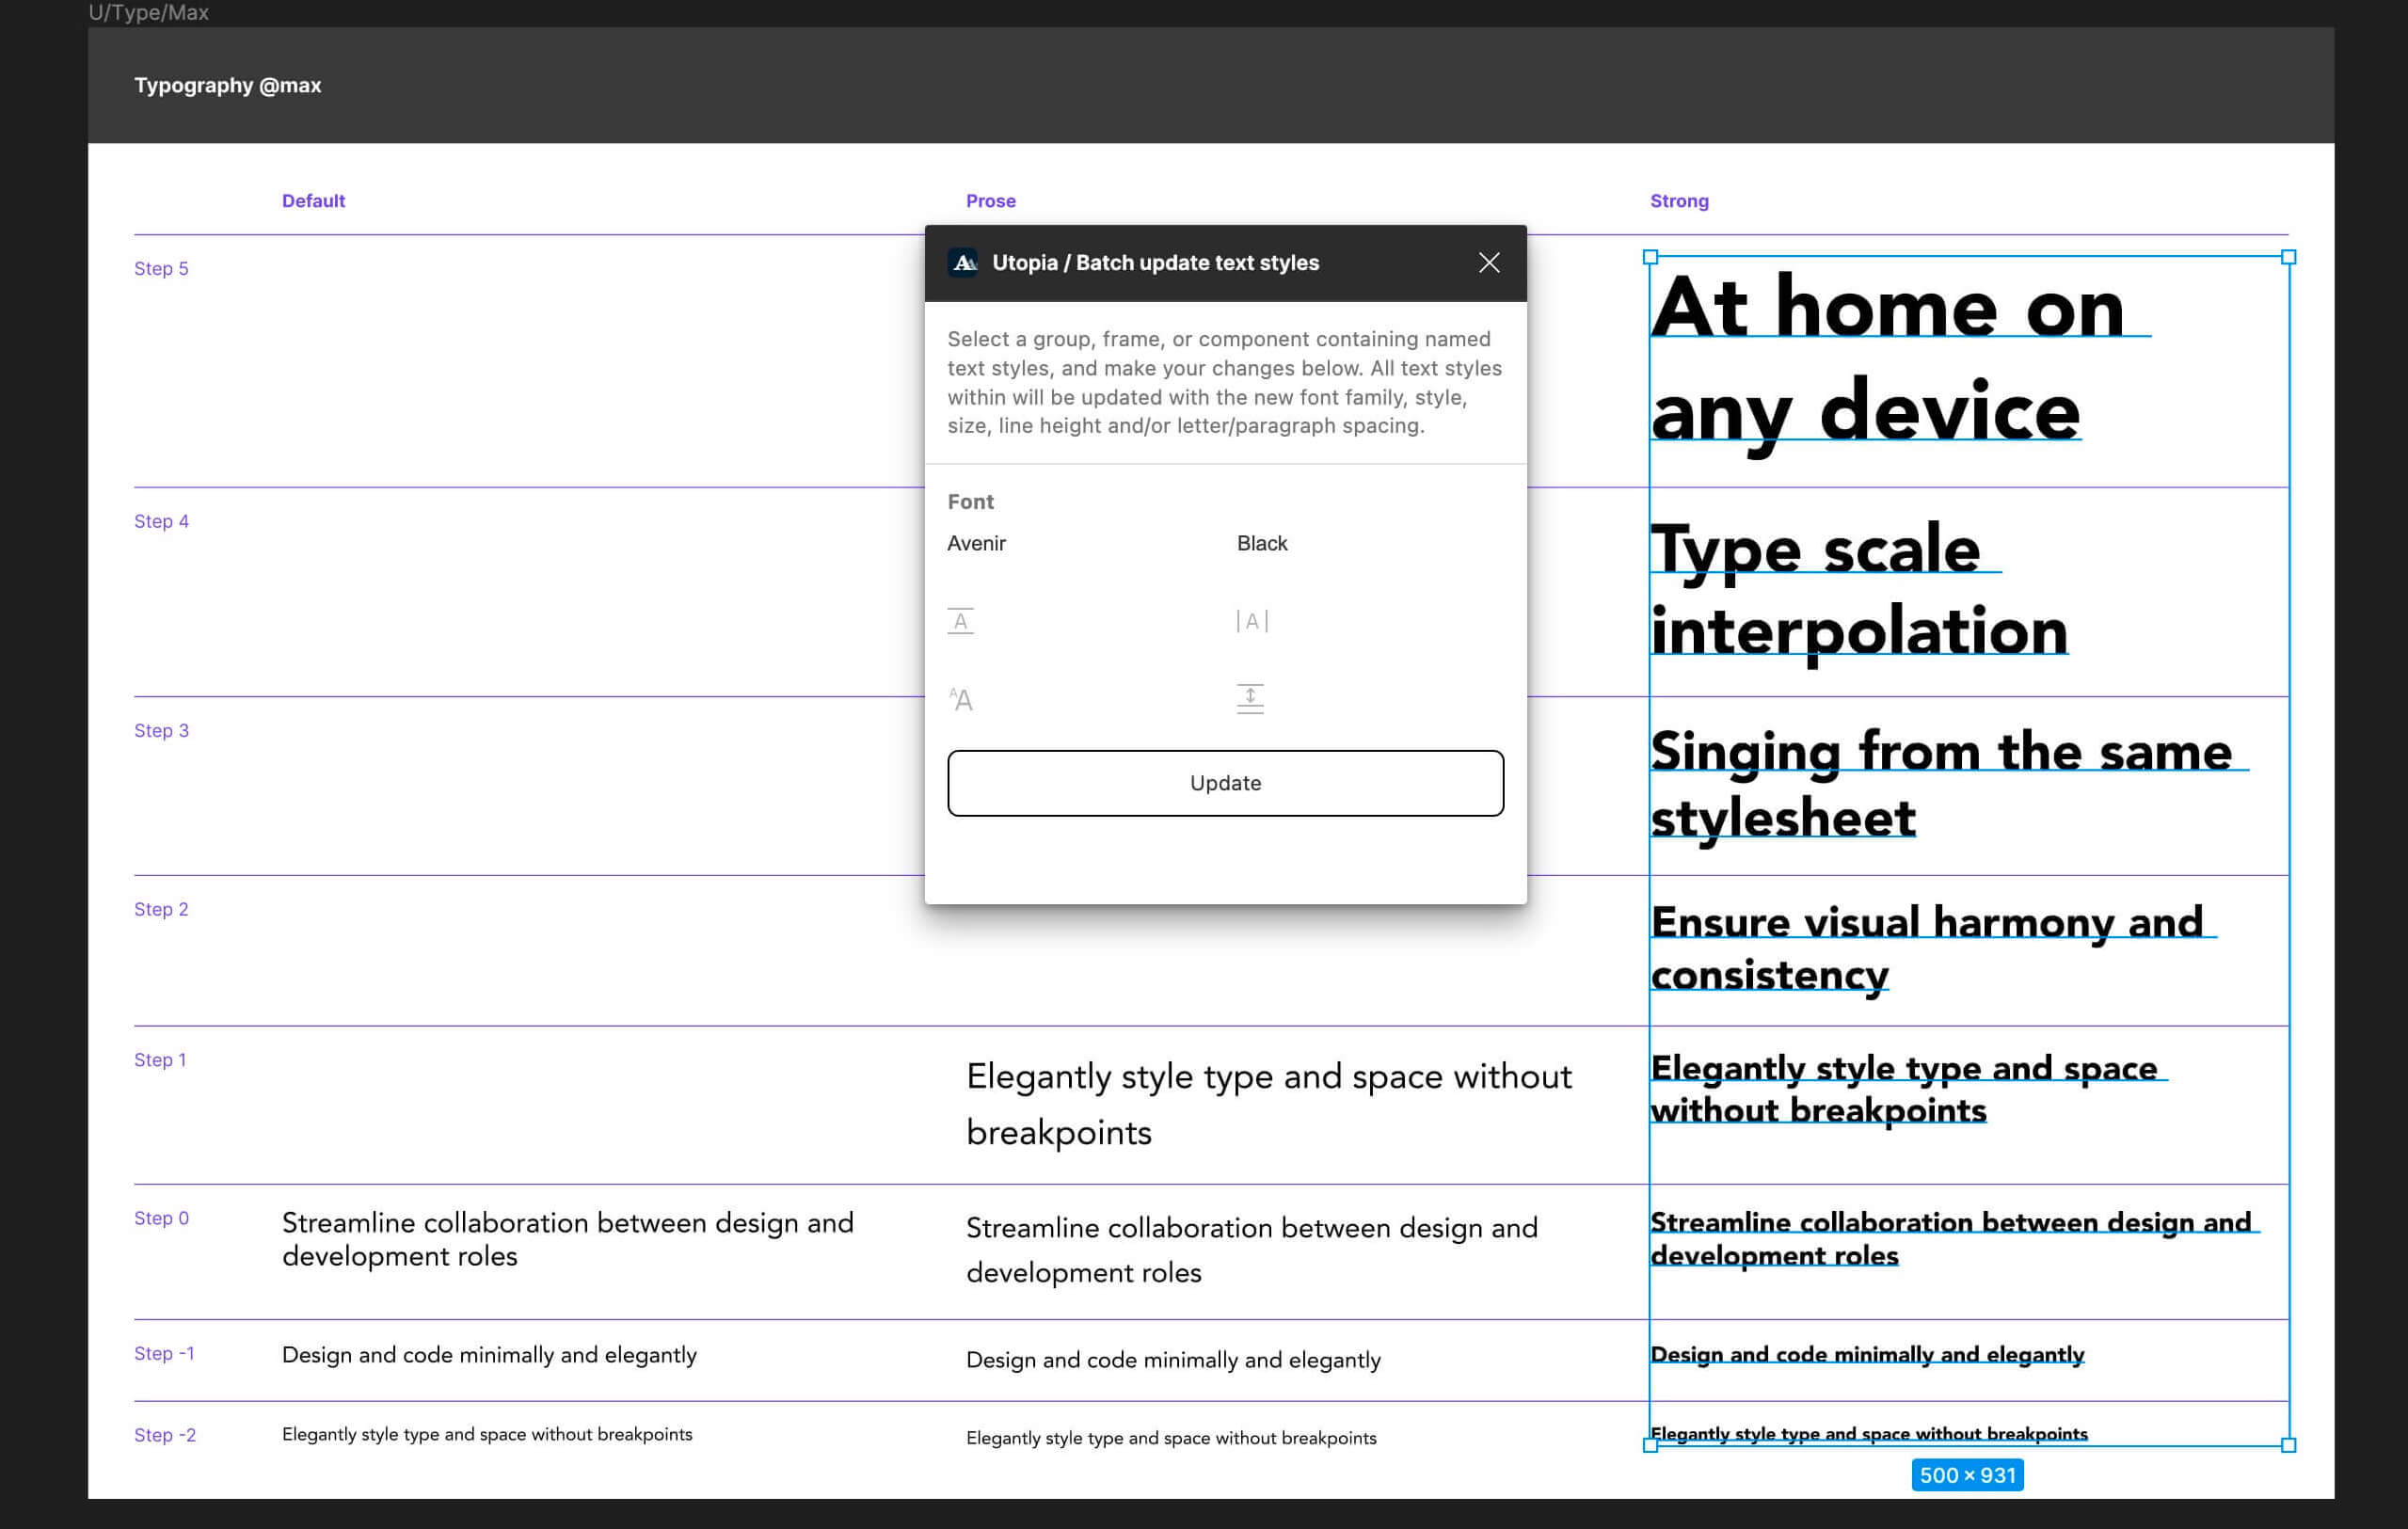
Once you've installed the plugin, go to the two newly generated typographic artboards and select them:
Run the plugin from the top menu; an info window will appear with six fields:
- Font family
- Font style
- Line height
- Letter spacing
- Font size
- Paragraph spacing
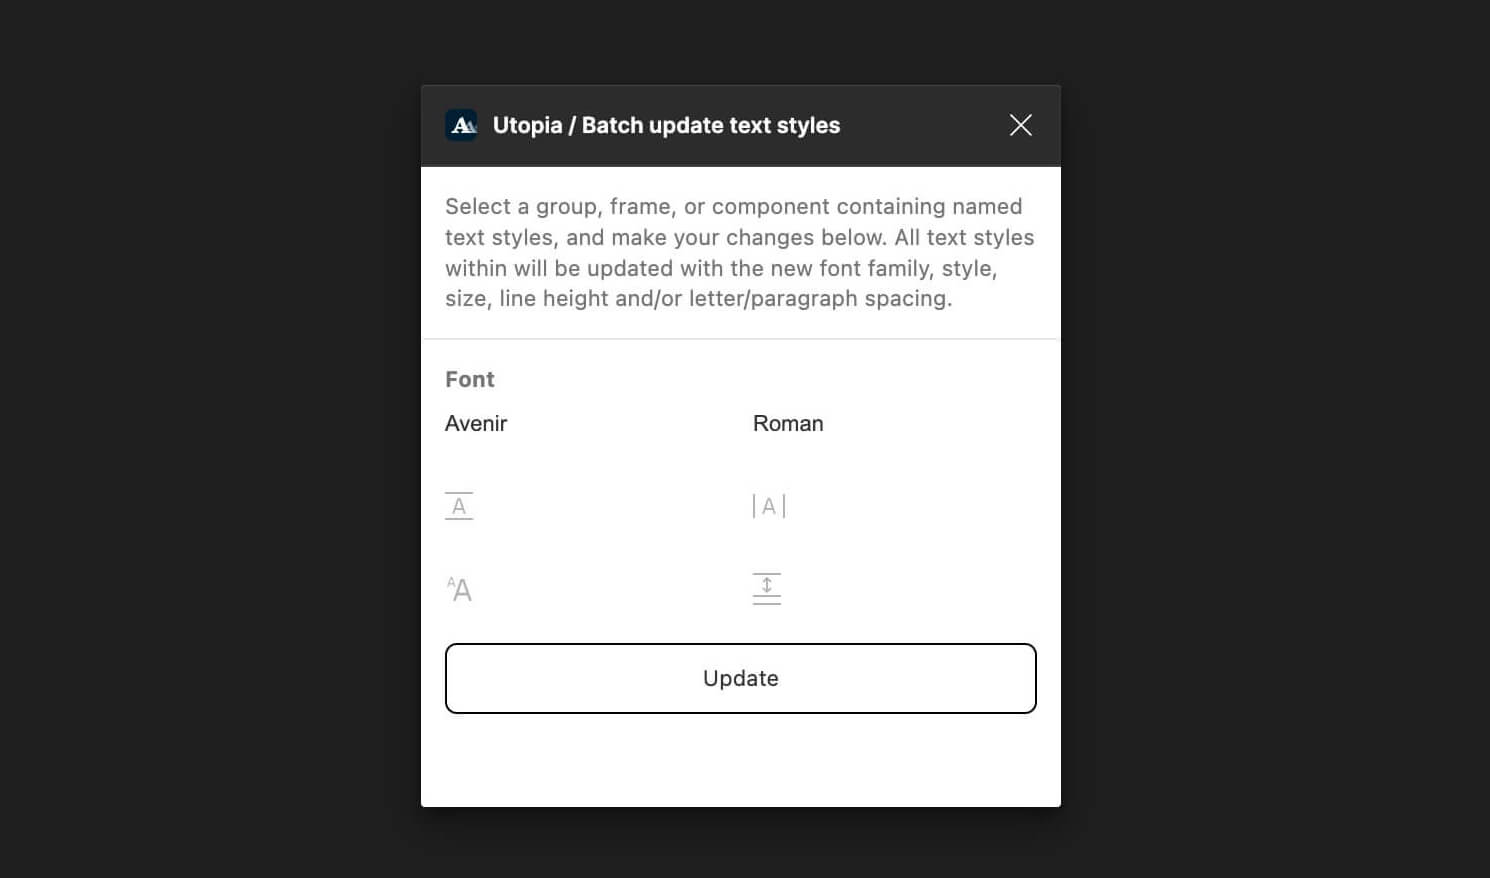
Any fields left blank are ignored when updating the type styles, so those properties will not be affected. For this example, we'll adjust the font family and style from Inter to Avenir Roman, and then hit update:
If you wish to alter a single column, for example all the Strong styles, you can use Figma's Deep Select feature to target only the styles you want to update. Hold the [Command] key (Mac) or [Control] key (Windows) and drag a selection box across those items before re-running the plugin:
Next steps
In future posts, we'll discuss how to use these plugins alongside the Utopia Kickstarter, to help you bootstrap your future design endeavours.
First published on 16 November 2022